A Clock Projector can project the time to a ceiling in the night.

There are lots of commercial alarm clocks with integrated clock projector on the market but I thought, it would be fun to build one myself.
Moreover it was a good project for becoming accustomed to the process of 3d-designing cases which can be 3d printed and to learn about designing tolerances.
The principle is easy – basically it works like a video beamer (or any other projecting clock^^).

LCD and Calculations
I choosed a small negative (background black) 64×32 LCD which has the dimensions of just 15mm x 12mm (active area 11.18mm x 5.58mm).

The goal was to build a complete projector with not more than 50mm x 50mm x 50mm (which I didn’t managed … But close to^^).
A small LCD has the advantage that everything becomes smaller and cheaper – this influences heavily costs for optics because a smaller LCD needs smaller optics to project an low distorted image.
Moreover a smaller LCD needs smaller focal length for a decent sized imaged on the ceiling. A good distance would be 2m from LCD to ceiling.
The formula for image width depending from the focal length is defined as:


with:
– S2 distance from lens to LCD and
– S1 distance from lens to ceiling
– W2 is the width of the LCD
– W1 is the width of the projected image
The formulas show that the smaller the focal length the larger the projected image will be.
I decided to go for 25mm because there are cheap lenses which can be obtained for about $12 in china.
For our values that would magnify the image by about x80 – 11.1mm LCD width would become 88.1cm image width on the ceiling in a distance of 2m.
Light and Condensor Lens
It was not really clear how strong a LED has to be in order to get a reasonable well readable picture in the night on the ceiling.
To be sure – actually I wasn’t really – I decided to use a high power LED with 1W and use a cheap chinese condensor lense to parallelize the light before it passes the LCD (this has do be done anyway but a condensor lens makes it possible to use more light because condensors are shaped in a way that allowes to get the lens as near to the LED as possible – so catching more light).


The two pictures show the condensor-lense which is directly mounted to the PCB the resulting light spot on the ceiling. It is a really gread lens which is made for my LED – so it fits perfectly and parallelizes the light nicely.
Electronics Construction
Two PCBs were designed – one holding the LCD and the actual projecting board.


The latter is equipped with 1W LED driver, STM32F103 Cortex ARM, a rotary encoder (for changing settings like brightness, standby-timer, time, …), USB, IR (both not used yet).
Mechanics Construction
Originally, I aimed for 50mm x 50mm x 50mm but I only managed to get to 60mm x 60mm x 60mm 😥 😉
Here an overview about all I designed:

From left to right: Case with DIY projection lens (I skip this part – it worked but not really well), Sony E-Mount, C-Mount. In the middle the rest.
LCD-Holder
A custom LCD-holder was designed to perfectly mount the LCD on the right place on the PCB.


Case – C-Mount Variant
There are incredibly cheap chinase C-Mount lenses with a focal length of 25mm. They are sooo cheap that image quality is really really bad when using for fotography.

But surprisingly it works (almost) perfect for the Mini DIY Projector 😀

The pillow-effect (optical distortion where the edges are not straight but bent outwards) is almost neglectable – resulting a much better image than I expected (after reading reviews to this lense)

Case – Sony E-Mount Variant
Just for fun – and because I have a 3d printer which works reliably without much attention – I did a variant for Sony E-Mount.

Here the projector with Walimex Pro 10mm 2.8 lens.
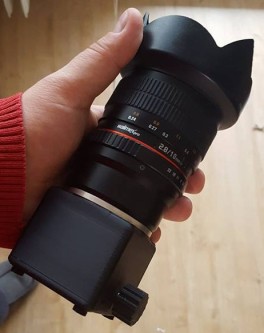
I have to admit – it isn’t that bright in reality but it’s still very readable although it is so large.

The image has more than 2m in width! And distortions almost non-existent 🙂
Downloads
Followig GitHub-Repository contains:
– Schematic
– Layout
– Bill of material
– STM32 Cortex ARM Source
– 3D-STL-Files
– Images

Du muss angemeldet sein, um einen Kommentar zu veröffentlichen.